Installing mirrors for eyes-on-baby visibility certainly provides invaluable peace of mind. But streaky dusty buildup or scratched clouding can quickly diminish clarity from subpar maintenance.
Follow this ABC guide to fundamental upkeep for maximizing optical integrity and safely securing pristine visibility.

Why proper mirror maintenance matters
Seeing the baby clearly at a glance minimizes dangerous distraction versus straining through filthy lenses. Scrubbing away sticky fingerprints, wiping foggy condensation, removing built-up road grime and polishing out fine scratches should become habitual.
Learning manufacturer cleaning guideline specifics and then formulating a preventative maintenance routine protects mirror functionality. The minimal effort lifts moods spotting smiles not streaks in the reflection!
Quick checks before every trip
Glance before departing ensures light obstruction detection and cleaning opportunities before acceleration limits access:
Scan for smudges
Baby hands love touching lenses! Fingerprint smudges severely reduce clarity. Keep microfiber cloths handy.
Verify the proper angle
Adjustments may be inadvertently bumped while loading passengers. Reconfirm positioning.
Assess mounting tightness
Bumps en route gradually loosen attachments over time. Snug any slipping hardware.
Developing the above rapid inspection habit identifies cleaning needs and prevents safety issues from acceleration surprises.
Fundamental surface cleaning ABCs
Mirrors require gentler cleaning fundamentals than windows to avoid scratches. Follow these surface care basics:
A – Approved supplies only
Use manufacturer-recommended products. Ammonia/vinegar can damage reflective coatings.
B – Broad circular wiping
Gently wipe across the entire surface using wide circular motions to avoid focusing pressure in one spot.
C – Crisscross microfiber cloth
Finish by using lint-free microfiber cloth in a broad criss-cross wiping pattern to polish.
Repeat fundamentals regularly to lift dirty buildup safely. Avoid using old raggedy towels leaving particles behind! Invest too in detachable mirrors allowing convenient sink scrubbing for stubborn sticky messes.
Spot cleaning challenging smudges
Certain sticky smudges resist broad circular wiping. Try these targeted spot treatments:
Greasy residue
Gently massage a little rubbing alcohol into the oily residue using cotton rounds before wide wiping clean.
Dried soap scum
Soak dried soapy deposit remnants with warm water then carve away using a plastic scraper.
Caked-on road grime
Allow vinegar-dish soap solution to penetrate caked dust before rubbing clean with a sponge.
Bird droppings
Quickly soak and dissolve corrosive bird mess then rinse to limit acid-etching damage to reflective coatings.
Scrub extra gently during spot stain removal of challenging smears to avoid unnecessary scratching of delicate mirror surfaces.
Maintaining anti-fog properties
Mirror fogging severely reduces cold weather visibility. Restore clarity and prevent re-fogging:
Wipe down after every trip
Quickly dry mirrors using chamois cloths before condensation solidifies into droplets.
Apply fog-resistance sprays
Reapply anti-fog coatings like RainX after cleaning to renew condensation beading protection.
Point small fans
Direct little battery-powered fans at mirrors to accelerate evaporation after car seats cool post-trip.
Combat chronic condensation with diligent wipe-downs augmented by sealant sprays. Desiccant pouches also help keep the air dry.
Touchless cleaning convenience upgrades
Manually cleaning mirrors prove burdensome. Upgrade to touchless convenience:
Self-cleaning mirror film
Nano-textured hydrophobic/oleophobic coatings enable water droplets/oil to simply slide off the surface taking grime with them!
Interior UV light sanitizers
Invest in UV-C light sanitizing wands effective at breaking down organic matter sticking to mirrors.
Compressed air blowers
Battery-powered compressed air gadgets blast away dust and debris from delicate mirror surfaces without needing wipes.
While touchless cleaning upgrades require some investment, the hands-free purification convenience restores flawless views with less work so you can stay eyes-on-road not smeared!

Scratch repair remedies
Light surface scratches eventually take a toll on mirror clarity. Employ these reconditioning techniques:
Metal polish compounds
Gently rub ultra-fine abrasive polishes like Brasso into scratches using microfiber to soften their visibility.
Clear-coat touch-up paint
Dab protective enamel paint into deeper scratches after polishing for smoothing encapsulation.
Replace mirror glass lens
For severe permanent scratching and clouding, replace the actual glass lens component.
Determine if affordable polishing sufficiently fixes light scratches or if replacements prove necessary. Avoid delaying scratch remediation allowing further deterioration.
Prevention through protective measures
Implementing basic precautions greatly reduces mirror surface damage:
Use microfiber cloths
Softer microfibers minimize fine scratch risk versus paper towels during wipe-downs.
Install protective borders
Adhesive foam bumper edging cushions side impact protection.
Handle carefully
Remind passengers to not touch mirrors and keep car doors from striking mirrors when opening/closing.
Protect mirror integrity between cleanings using bags/sheets when parked in garages preventing dust accumulation and accidental bumps.
Let’s recap mirror maintenance ABCs
Fight foggy filth-threatening baby visibility through diligent cleaning care, preventative maintenance, protective accessories, and restorative repairs.
Inspect angles and wipe smudges before departing, safely scrub broad circles to clear gunk buildup, seal anti-fog coatings, mask delicate surfaces between trips and rejuvenate scratched lenses.
By conscientiously maintaining that clear clean connection revealing backseat smiles, driving confidence remains completely smudge-free!
Expanded tips on chemical-free natural cleaning solutions
While cleaning chemicals conveniently dissolve grime, many ingredients prove problematic for delicate mirror surfaces and human health. Seek out gentler cleansing solutions:
Avoid ammonia
Though effective in lifting stains, ammonia strips specialized coatings and damage lens tint. The strong fumes also irritate the eyes.
Skip vinegar
Acidic white vinegar cuts grease but erodes reflective backing, especially on plastic lenses with prolonged exposure.
Leverage baking soda
Sodium bicarbonate gently lifts dirt without noxious chemistry. Mix with water into a spreadable paste scrubbed with microfiber.
Harness hydrogen peroxide
The natural oxidizing fizzing action hydrogen peroxide exhibits help bubble away grimy buildup without abrasive rubbing.
Deploy essential oils
Potent antimicrobial botanical oils like citrus, eucalyptus and tea trees naturally sanitize streaky mess while emitting calming aroma.
Cleaning green protects baby health too and skips risky chemical drips into car seat cushions. While natural solutions require a bit more scrubbing elbow grease, mirrors gleam gorgeously without toxic residues.
Cautious cleaning around sensors & camera lenses
Modern vehicles that integrate cameras, sensors and antenna modules near windshield and ceiling mirrors must avoid contact during cleaning. Note proximity cushions:
Rain Sensors: Avoid circular wiping motion over rectangular rain sensor strips. Clean just the housing perimeter instead.
Cabin Cameras: Gently angle microfiber swipes to outer edges without touching central convex bubble lens covers to prevent scratches.
Overhead Console Buttons: Drape towels as shields fully covering the module controls when cleaning nearby mirrors to prevent liquid drips into electronics.
Sunroof Switch Panels: Be extra careful with cleaning solutions around membrane sunroof control units likely to glitch if liquids seep inside.
Getting mirrors squeaky clean risks overspray, fluid migration and physical interference with intricate vehicle electronics. So exercise extreme targeted caution when cleaning adjacent mirrors.
DIY solutions for illuminating darkness
Nighttime driving relies on mirror clarity even more, yet dimness dissipates discernibility. Try this brightness boost DIY hacks:
Add string lights
Affix cute LED micro-bulb accent lighting with adhesive strips for an extra visibility boost at affordable prices.
Install light trim
Integrate glow-in-the-dark acrylic edging showcasing fun luminescent neon hues outlining mirrors in the darkness.
Use luminous paints
Coat mirror backing with specialized strontium aluminate phosphorescent paints absorbing sun rays to later radiate a soft glow in shadows.
While aftermarket mirror options feature integrated lighting, custom luminosity proves equally achievable on standard models for thrifty DIY enthusiasts through creative modifications. Now let rays reflect revelations!
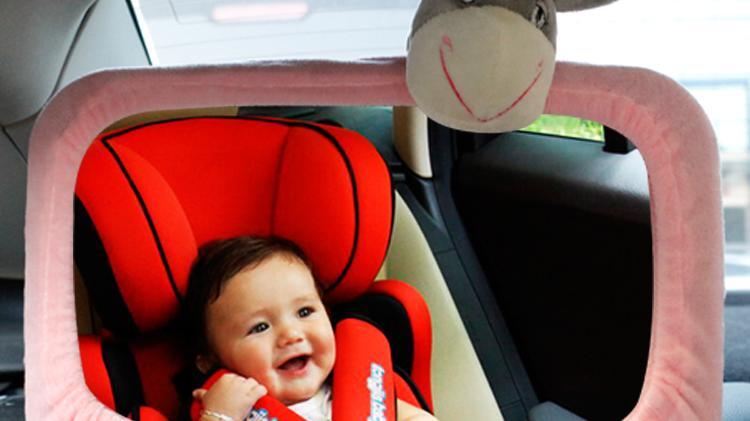
Troubleshooting visibility restoration roadblocks
Frustrating cleaning challenges occasionally arise dampening mirror clarity redemption. Conquer these common roadblocks:
Problem: Streaky film remains after scrubbing
Solution: Wipe the cleaner using distilled water avoiding mineral deposits then reapply the hydrophobic coating.
Problem: Permanent scratch halo visible
Solution: Further polish then paint over with Clear Coat enamel and re-tint backing.
Problem: Parts of a mirror not getting clean
Solution: Detach the entire unit for complete soaking and scrub access if clips allow easy removal.
Problem: Cleaner causing added scratches
Solution: Review product instructions to ensure the chosen cleanser suits the mirror material.
Hopefully addressing the above trouble areas will get 360-degree sparkling visibility revitalized! But don’t hesitate to consult experts for cleaning conundrums requiring extra assistance.
Let’s recap maintenance fundamentals
Protecting clear sightlines through conscientious mirror care ensures continued driving confidence spotting baby smiles not streaks. Conduct multi-point inspections confirming cleanliness pre-trips and post-trips. Master gentle broad circular wiping motions with approved cleaners and microfibers to lift sticky buildup.
Reapply protective treatments between journeys and carefully restore scratched surfaces. Implement preventative accessories defending glassy finishes. By dedicating days to diligent detailing while finding solutions for cleaning challenges, rearview illumination persists flawlessly!


